Crusty French Bread Rolls
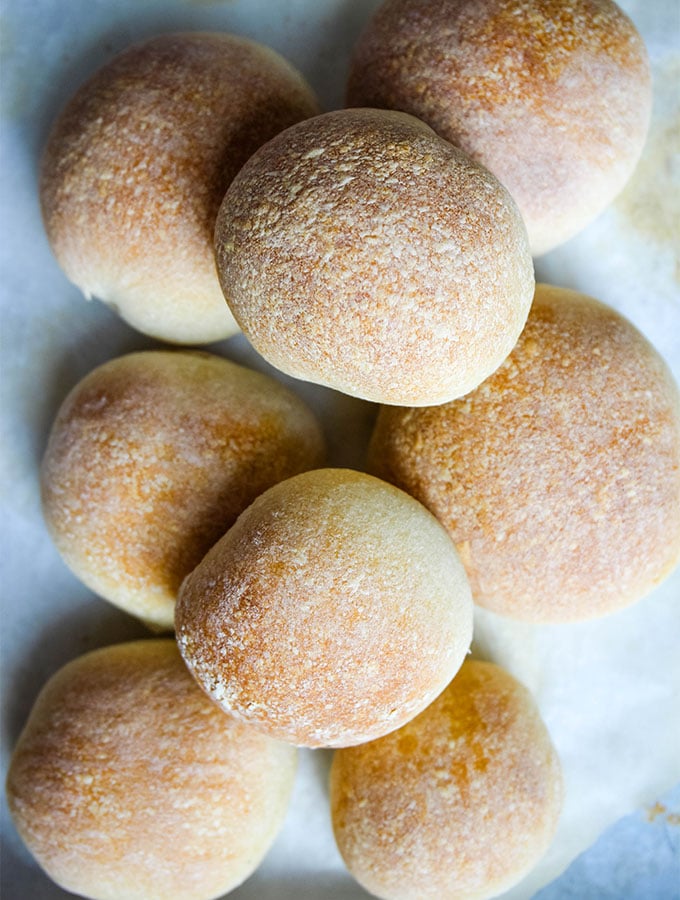
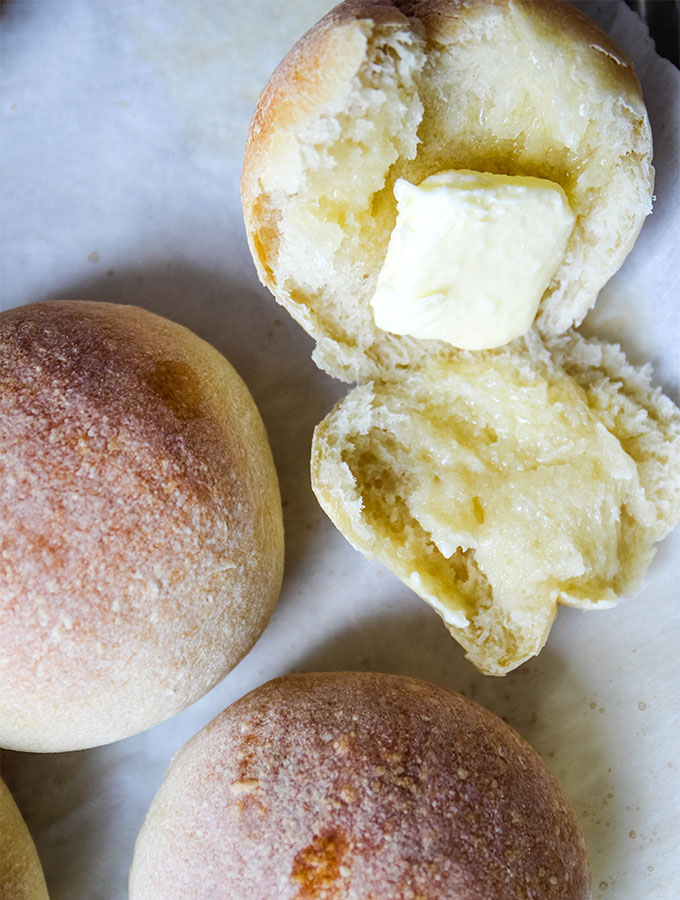
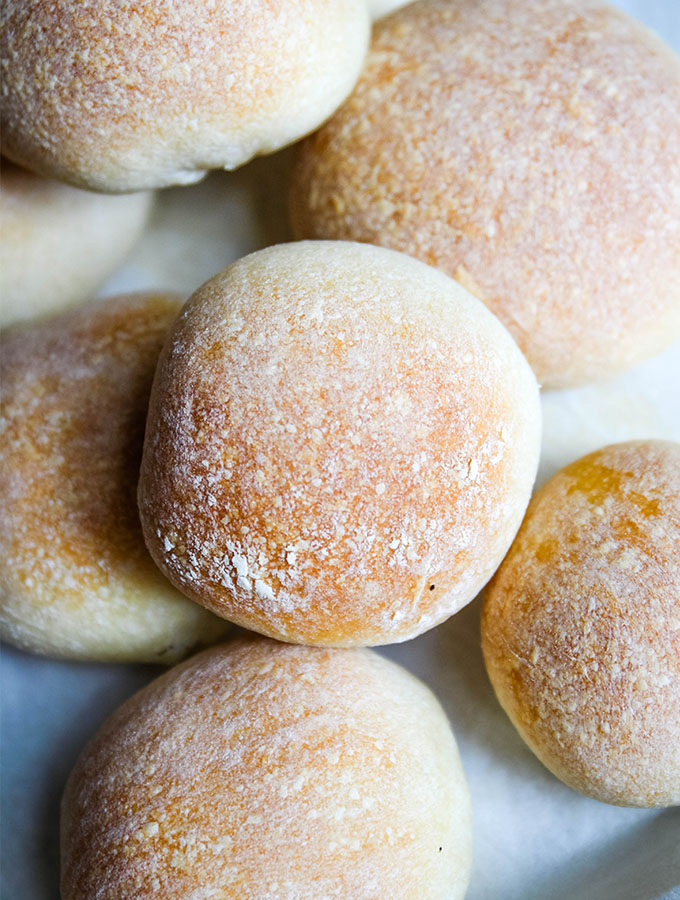
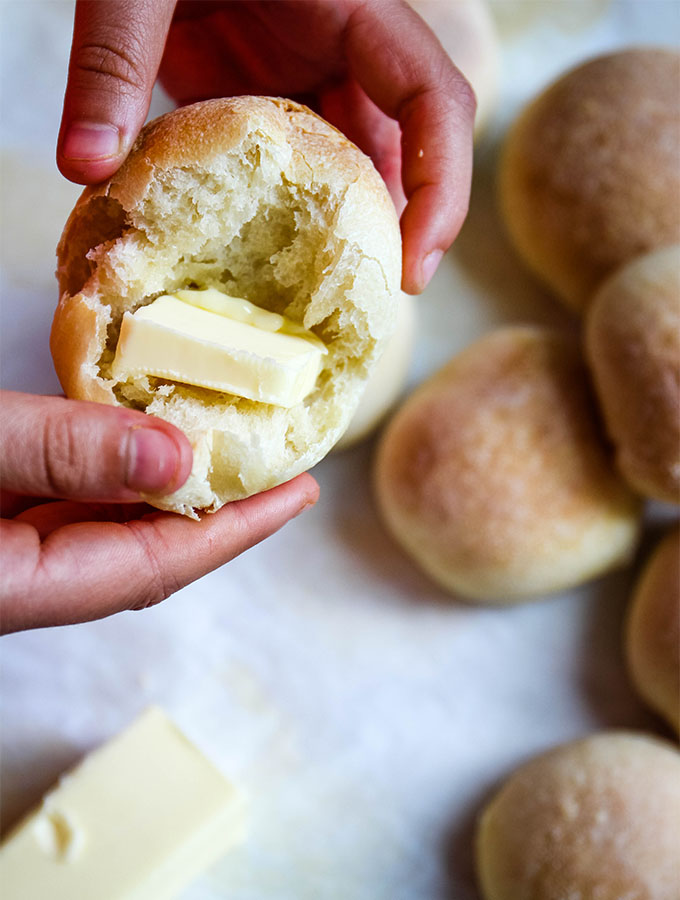
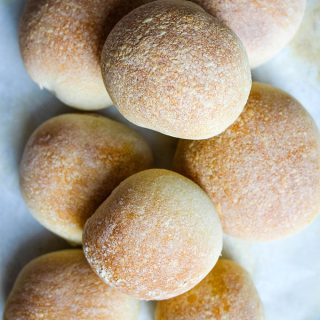
Crusty French Bread Rolls are chewy, crusty, and soft and fluffy on the inside. These rolls are so delicious when they are hot out of the oven and are the perfect staple on your dinner table!
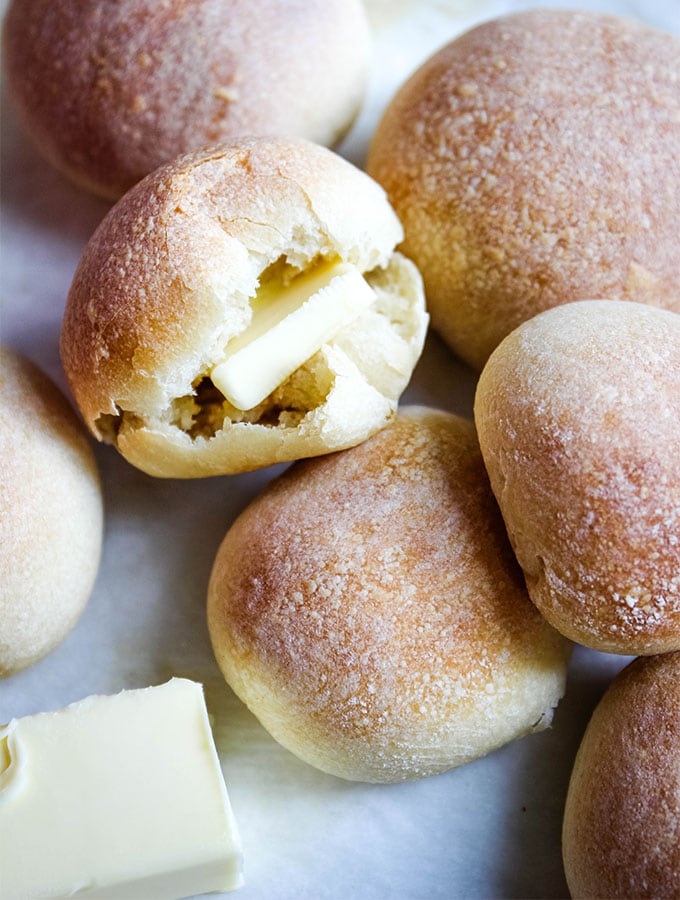
Table of Contents
Easy French bread rolls
If you love bread recipes, check out my easy olive and herb focaccia, or these delicious pull apart rosemary garlic dinner rolls.
There’s this restaurant in Massachusetts called Bertucci’s and they have these super crusty bread rolls that are undeniably the best rolls you’ve ever had. They are crusty on the outside, soft on the inside, and they are served piping hot in a little basket. It’s a great way to get the family around the table.
French bread rolls are my favorite thing to make on the weekends. They go great with basically any kind of meal you are making! These rolls take a little but of time, but that’s what the weekend is for- taking it slow and easy!
These crusty French bread rolls are perfect for sopping up red wine pasta sauce or penne alla vodka sauce! They can be pulled in half easily and are just SO good when they are fresh out of the oven!
With the holidays coming up, I want you to have the best, most delicious food on your table, so I’ve been developing this recipe for months! I have perfected these bread rolls so they are light and fluffy on the inside, but crispy and crunchy on the outside. Their flavor is so well developed thanks to their extended rising time and resting time in the fridge. All good things take time.
Crusty bread rolls recipe ingredients
- Water- The water needs to be about 110 degrees so it’s warm enough to activate the yeast but not too hot or it will kill the yeast.
- Yeast- I use active dry yeast, but if you don’t have a lot of time you can opt for quick rising yeast.
- Honey- Honey helps feed and activate the yeast in these bread rolls.
- All-purpose flour- Unbleached flour makes these rolls flavorful fluffy.
- Salt- Salt is used to better flavor the bread rolls.
Chef’s tips
Make them your own
You can switch up the flavor of these rolls easily with fresh herbs! You can add fresh thyme or rosemary to the rolls to flavor them even more. Roasted garlic is also another great option!
Make them ahead of time
These rolls need to be refrigerated for 4 hours before they are baked, but can be refrigerated for up to 2 days in advance before they are baked.
Alternatively, you can bake these ahead of time before you serve them. These rolls stay good for 2-3 days in an airtight container on the counter.
Use fresh yeast
This recipe relies on the yeast to do it’s job, so make sure the yeast is fresh and still alive. The yeast should get foamy when it is proofed. If there is no foam, toss it and buy new, fresh yeast.
Make these even faster
I have made these French rolls so many different ways to understand every step of the process. You can make these rolls using quick rise yeast instead of acitve dry yeast.
If you decide to use quick rising yeast, the bread will rise in half the instructed time. You can refrigerate the bread rolls for 2 hours or up to 2 days.
How to make French bread rolls
- Proof the yeast. Add 110 degree water, honey, and the yeast to a mixing bowl and mix it. Allow the mixture to proof for about 10 minutes. The yeast will get foamy.
- Add the ingredients. Combine the flour and salt to the water mixture in the mixing bowl. Mix the mixture and kneed for about 8 minutes to activate the gluten. The dough will be sticky.
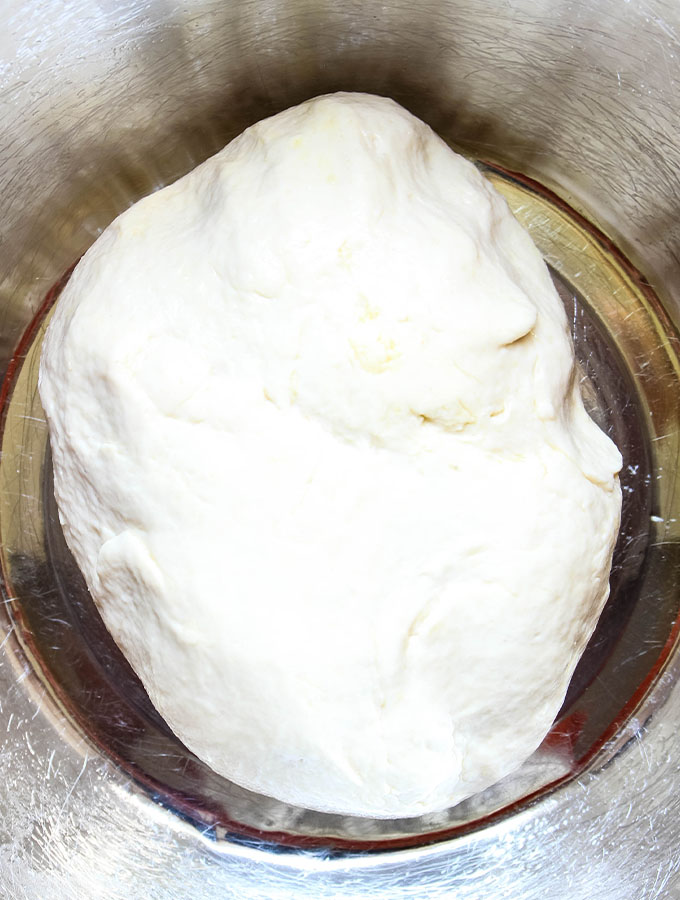
- Allow the boule to rise, a couple of times. Place the boule in a well-oiled bowl and place a damp kitchen towel over the top of the bowl. Place the bowl in a warm, draft-free area (like inside a turned-off microwave) and allow the bread to rise for 45 minutes. Fold the dough into itself on all four edges of the dough. Cover the bowl with the towel and allow it to rise again for 30-45 minutes.
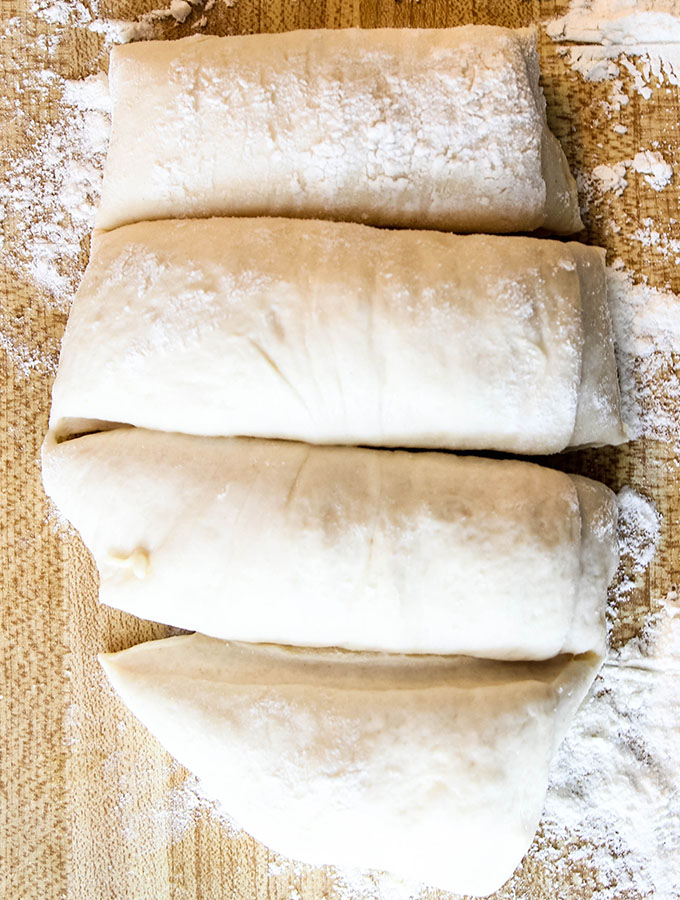
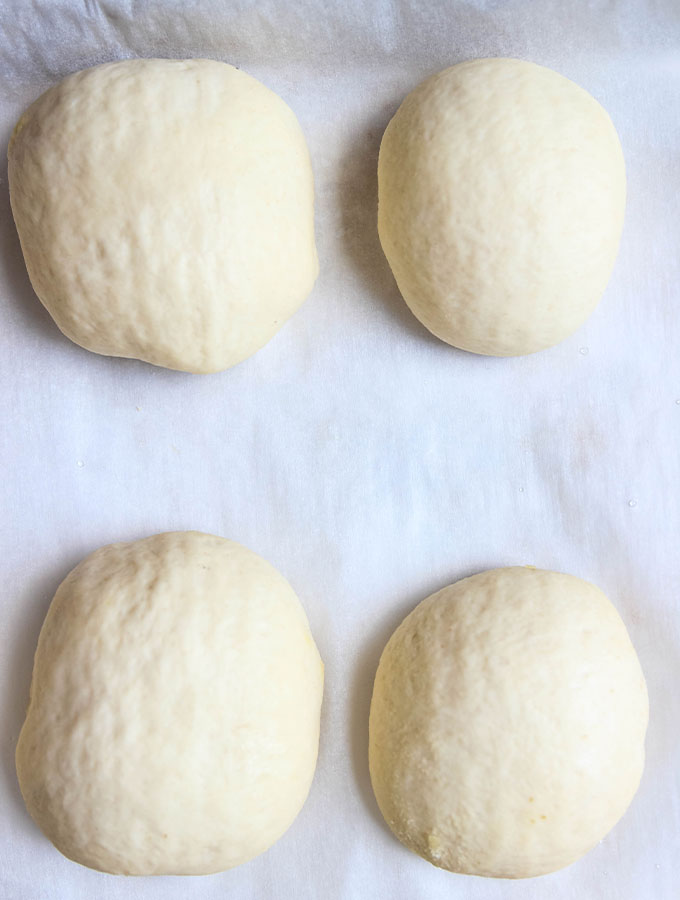
- Shape the rolls. Scatter flour on a flat work surface, then dump the dough onto it. Divide the dough into 4 equal sections. Divide the dough again in half into equal pieces. Fold the four edges of the dough under itself, then smooth the bottom and place it on a parchment paper-lined baking sheet or a 9 X 9 baking dish (whatever fits easier in your fridge).
- Refrigerate the French bread rolls. Place the rolls in the fridge and refrigerate for 4 hours or up to 2 days.
- Bake the rolls. Preheat the oven to 500 degrees. While the oven preheats, take the rolls out of the fridge and place them on the counter so they have time to warm up. Flick a little water onto the top of the bread rolls by wetting the tips of your fingers and flicking. Place the rolls in the oven and bake for 10 minutes. Reduce the oven to 400 degrees, then continue baking for another 10-15 minutes, until the tops are golden.
Why refrigerate these bread rolls
Placing the dough in the refrigerator allows the yeast to slow down the fermentation process and better develop the flavor. This step is not necessary and is time-consuming, but it really does add a whole lot of flavor to the rolls!
Italian dishes to serve with these crusty French bread rolls
- Linguine with littleneck clams in a delicious white wine sauce is the perfect, easy Italian dinner that will impress the crowd!
- This classic vegetarian minestrone soup is the perfect bowl to warm up to! It’s packed with hearty vegetables and pasta for a filling and healthy meal.
- Authentic Italian beef braciole (braciola) is made with tender skirt steak that is rolled with bread crumbs, provolone cheese, and prosciutto, then simmer in a red wine tomato sauce. This is perfect for a hearty Sunday dinner!
- This easy five-minute marinara sauce is made with vine-ripened crushed tomatoes, basil, garlic, and onion to deliver the best tasting pasta sauce ever!
- Crab stuffed manicotti with homemade alfredo sauce is an easy Italian- American dinner that is hearty, creamy, and packed with cheesy deliciousness!
Be sure to follow me on Facebook, Pinterest, and Instagram to stay in touch! I love to see your creations! Tag me at #SeaSaltSavorings to show me what you’ve made!
Crusty French Bread Rolls
Ingredients
- 1 cup water 110 degrees
- 1 tsp active dry yeast see notes for using quick rise
- 1/2 tsp honey
- 2 1/2 cup all purpose flour
- 1 tsp salt
Instructions
- Proof the yeast. Add 110 degree water, honey, and the yeast to a mixing bowl and mix it. Allow the mixture to proof for about 10 minutes. The yeast will get foamy.
- Add the ingredients. Combine the flour and salt to the water mixture in the mixing bowl. Mix the mixture and kneed for about 8 minutes to activate the gluten. The dough will be sticky.
- Allow the boule to rise, a couple of times. Place the boule in a well-oiled bowl and place a damp kitchen towel over the top of the bowl. Place the bowl in a warm, draft-free area (like inside a turned-off microwave) and allow the bread to rise for 45 minutes. Fold the dough into itself on all four edges of the dough. Cover the bowl with the towel and allow it to rise again for 30-45 minutes.
- Shape the rolls. Scatter flour on a flat work surface, then dump the dough onto it. Divide the dough into four equal sections. Divide the dough again in half into equal pieces. Fold the four edges of the dough under itself, then smooth the bottom and place it on a parchment paper-lined baking sheet or a 9 X 9 baking dish (whatever fits easier in your fridge).
- Refrigerate the French bread rolls. Place the rolls in the fridge and refrigerate for 4 hours or up to 2 days.
- Bake the rolls. Preheat the oven to 500 degrees. While the oven preheats, take the rolls out of the fridge and place them on the counter so they have time to warm up. Flick a little water onto the top of the bread rolls by wetting the tips of your fingers and flicking. Place the rolls in the oven and bake for 10 minutes. Reduce the oven to 400 degrees, then continue baking for another 10-15 minutes, until the tops are golden.
Notes
Nutrition
Nutrition values are estimates, for exact values consult a nutritionist.


We are a participant in the Amazon Services LLC Associates Program, an affiliate advertising program designed to provide a means for sites to earn advertising fees by advertising and linking to amazon.com.
I can’t believe there are no reviews on this recipe.. IT IS AMAZING!! I have made these at least once a week since I found it- they are a family favorite. Super easy to make. I have tried many roll recipes, none were quite right- but this is perfect! (and just like Bertucci’s!)
Dear Sherry,
Thank you for this recipe. The rolls came out perfectly.
Favorite dinner roll recipe! So good! I let them ferment out of the fridge for an extra 45 minutes to get them extra big and fluffy
Why do you have to refrigerate the dough? Does it change anything? Just curious.
Refrigerating dough is a common technique used in baking, known as cold fermentation. Here’s why it’s often recommended:
Flavor Development: As the dough chills, yeast continues to ferment the dough but at a slower pace, giving more time for the flavors to develop. This extended fermentation period allows the yeast and bacteria to produce more of the byproducts that give bread its complex, yeasty, slightly tangy flavor.
Texture Improvement: The slow fermentation process also improves the texture of the bread, making it lighter and more tender. It allows the gluten in the dough to relax, which can make the dough easier to shape and handle.
Convenience: Another benefit of refrigerating the dough is that it can provide more flexibility with your baking schedule. You can prepare the dough when you have time, let it rise in the refrigerator for a certain period (as the recipe suggested, it could be up to 2 days), and then bake it when you’re ready.
Better Crust Formation: Chilled dough often results in a better crust after baking as the contrast between the cold dough and the hot oven creates a rapid burst of steam, leading to a nice crust.
In the case of our recipe, the cold fermentation process is being used primarily to improve flavor and texture, and provide a better crust. You can refrigerate the dough for 4 hours or up to 2 days, which gives you flexibility in terms of when you want to bake the rolls. The longer you leave the dough in the fridge, the more the flavor will develop, but even a short period in the fridge will still make a difference.
Perfect! I’ve made these twice, and I put the dough in the fridge to rest before shaping. Once I’m ready to bake I roll out 8 rolls and put them on 2 rows of a perforated French bread loaf pan that I’ve lined with parchment. It’s hard to cover so I let it rise uncovered in my microwave with a pyrex measuring cup of hot boiled water to keep it moist and warm.
would you have the nutrition/cals per batch?
I updated the nutrition, hope that helps 🙂
Made these for the first time today. Delicious. Will make again and let the dough develop longer. A New favorite. used my baking stones to cook them so only took about 20 minutes. Also my oven doesn’t go up to 500 but 480 was great for 10 minutes and then 400 for.10 minutes. Also I used 1&1/4 cup of all purpose flour and 1&1/4 Cup of bread flour. Had to add about 1 tablespoon to the flour as it was too dry while kneading in my mixture.
Mixed the dough yesterday and baked them last night after Church. They are so good! I posted pictures of them on my Facebook and after someone asked I posted a link to your recipe. Thanks so much for sharing your recipe!
Can these be frozen after baking?
Yes, you can! Allow them to cool completely to room temperature after baking. Then, wrap them individually in plastic wrap or aluminum foil to prevent freezer burn and maintain their freshness. Place the wrapped rolls in a freezer bag or an airtight container and freeze. When you’re ready to enjoy them, thaw the rolls at room temperature or gently reheat them in the oven to revive their crusty exterior. Reheating them in an oven preheated to 350°F for about 5-10 minutes should help them regain their delightful crispy crust and warm, soft interior.